


C-Tug R Assembly Instructions
Step 1. Kickstand

Step 1. Slip the bottom of the kickstand into the inside of one of the crossbeams.
Step 2. Pull kickstand
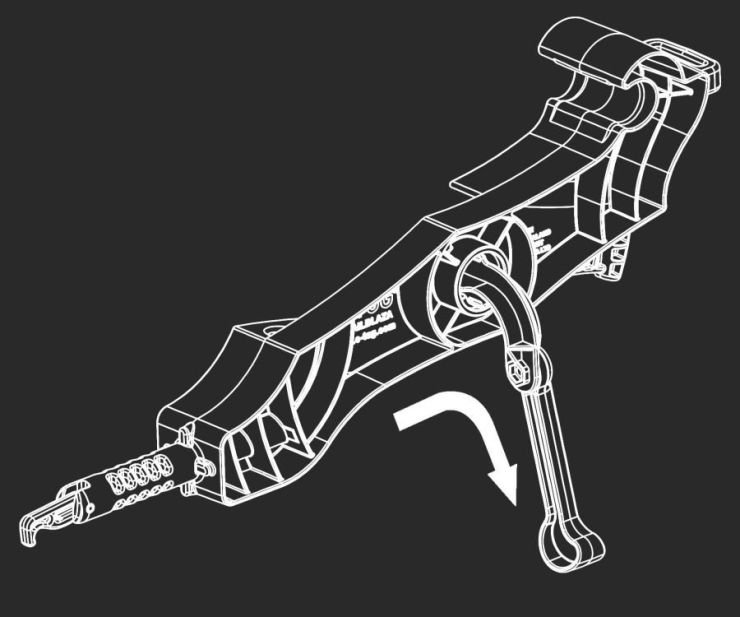
Step 2. Pull kickstand completely through and ensure the pins in the kick stand base insert into the indentions on the inside of the Crossbeam.
Step 3. Crossbeams together
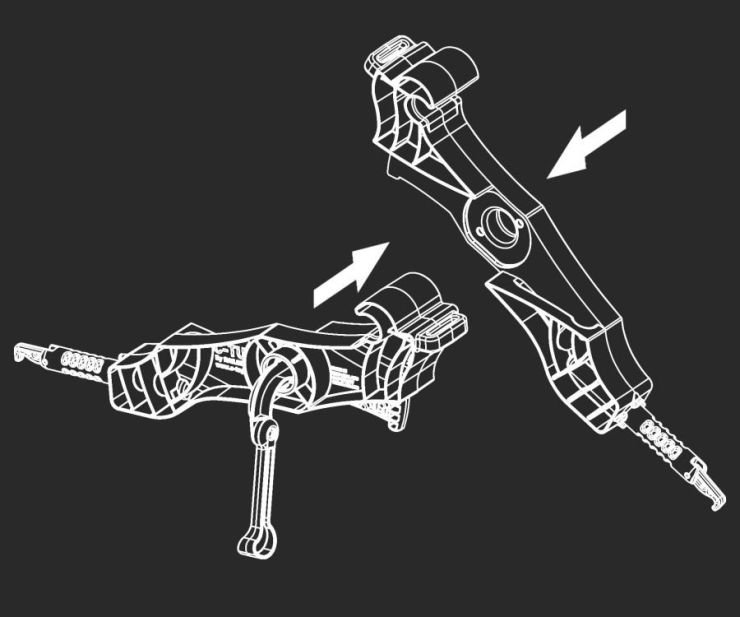
Step 3. Bring the other side of the crossbeam to meet up against the kickstand side.
Step 4. Lock Crossbeams together.
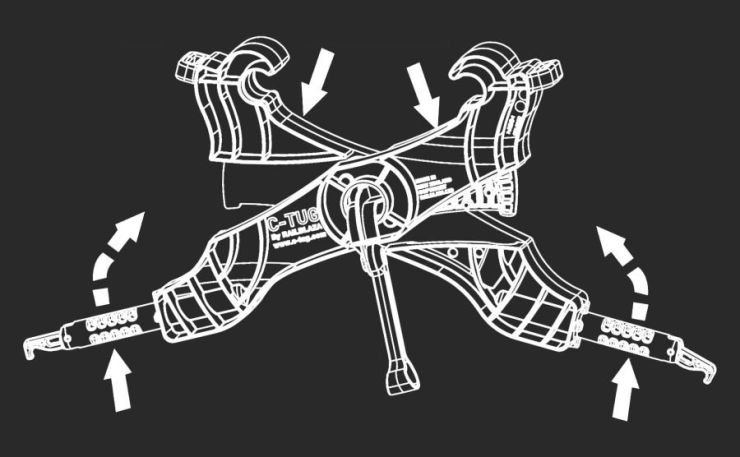
Step 4. Compress both sides of the crossbeam and you should feel a click as the cross beam pins fit into the opposite side.
Step 5. Assemble C-Tug Rails.
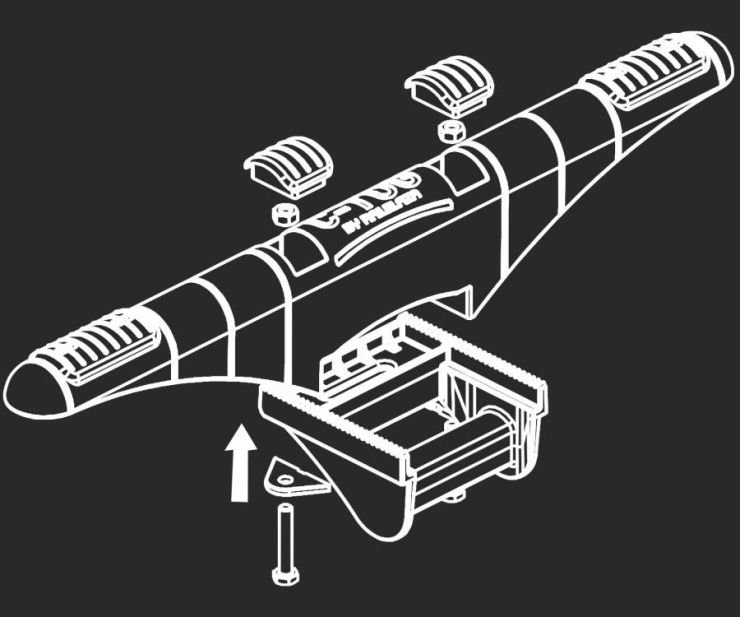
1. Insert nuts into hex recess through the C-TUG Rails
2. Add green D-washers over bolt, flat edge against bracket
3. Tighten buy hand
4. Press on green pads.
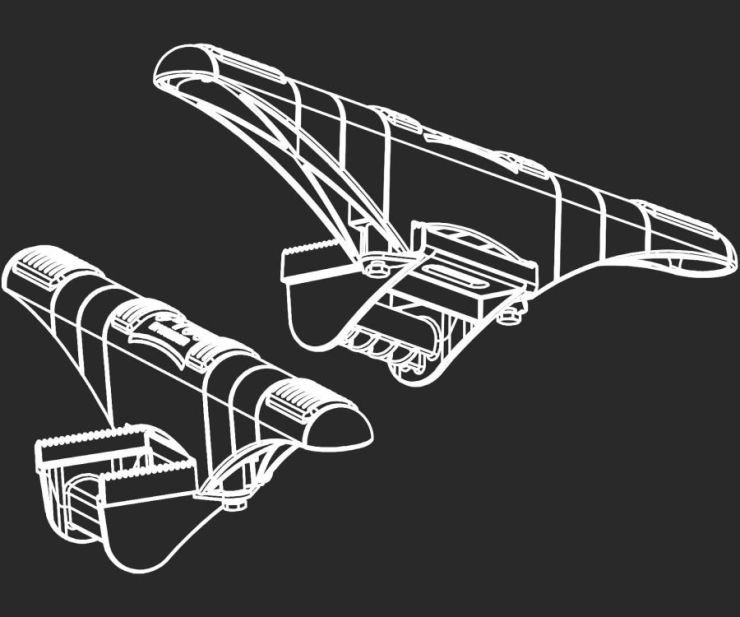
Step 6. Assembled C-Tug R Rails
Step 7. Attach C-Tug Rails
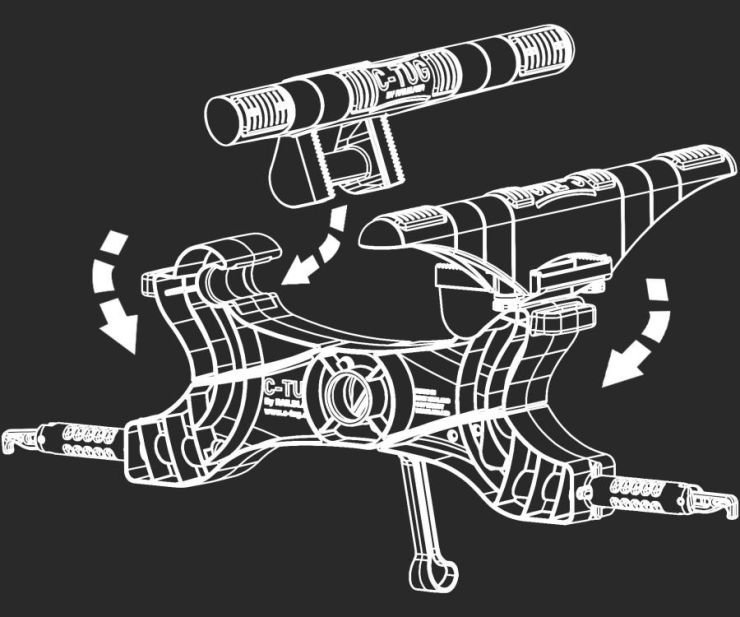
Step 7. Swivel the rails into the hook and continue to swivel the rails until they are flat.
Step 8. Attach Wheels
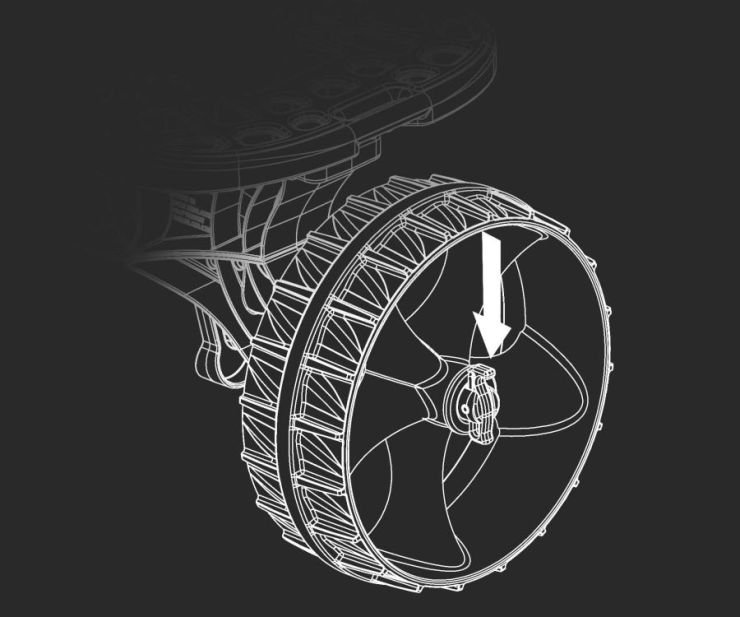
Step 8. Slip the wheel over the axle and push down on axle pin till it clicks into the lock position.
CLICK TO LOCK
Step 9. Adjust C-Tug Rails- to suit your kayak

Step 9. Position the Rails of your C-Tug to match your kayak hull and tighten bolts.
Step 10. Thread Strap
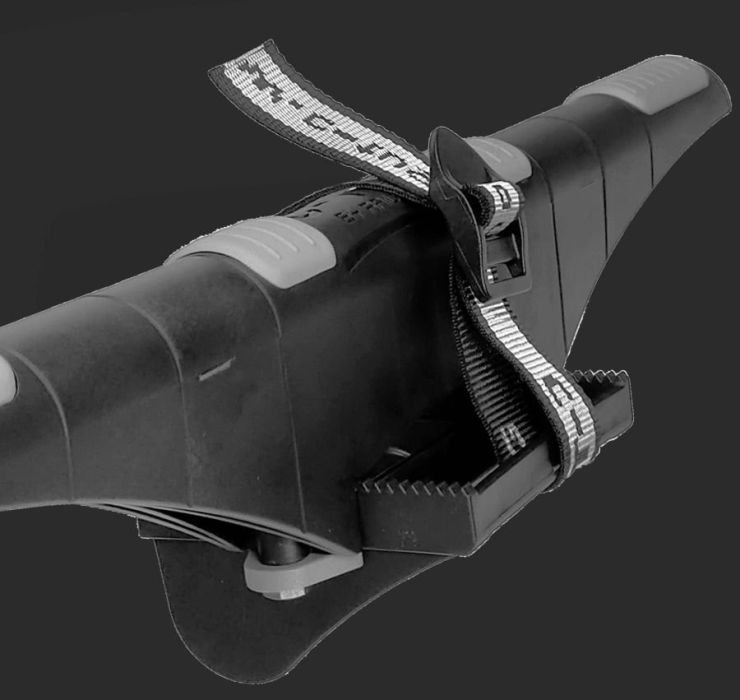
Step 10. Click HERE to watch!
Step 11. Complete!

Step 11. Complete!
Place the Kickstand at the back of the kayak to ensure it folds away if it hits an object.